
8 Proven Techniques for Capturing Stunning Time-Lapse Footage
Mastering Timelapse Photography
Time-lapse photography offers an unparalleled way to visualize the subtle and captivating changes in our environment over extended periods. This technique empowers photographers to compress hours, days, or even months into seconds, creating mesmerizing visuals that capture the motion of clouds, the growth of plants, or the bustling activity in a cityscape.
Mastering time-lapse photography can transform ordinary scenes into extraordinary visual stories, showcasing the world in a way that is often unseen by the naked eye. By exploring and applying proven techniques, photographers can elevate their work and produce footage that is both stunning and evocative.
1) Choose the Right Interval
Selecting the appropriate interval between shots is crucial for creating smooth time-lapse footage. The interval determines the speed at which the scene appears to move in the final video.
For fast-moving subjects, such as clouds, a shorter interval—around 2 to 5 seconds—works well. This ensures that the motion is smooth and captivating.
On the other hand, for slower-moving scenes, like a plant growing, a longer interval—measured in minutes or even hours—might be necessary. This captures gradual changes more effectively, leading to a more dramatic effect.
If the footage involves light changes, like a sunset or sunrise, an interval of 1 to 3 seconds is generally suitable. This captures the subtle variations in light without making the changes too abrupt.
Consider the frame rate of the final video. Most time-lapse videos are created at 24 or 30 frames per second (fps). Calculate the number of frames needed and then determine the appropriate interval to capture the required number of frames within the timeframe of the event.
Experimenting with different intervals can also be beneficial. Testing various settings might reveal the best choice for a particular scene or subject.
2) Stabilize Your Camera
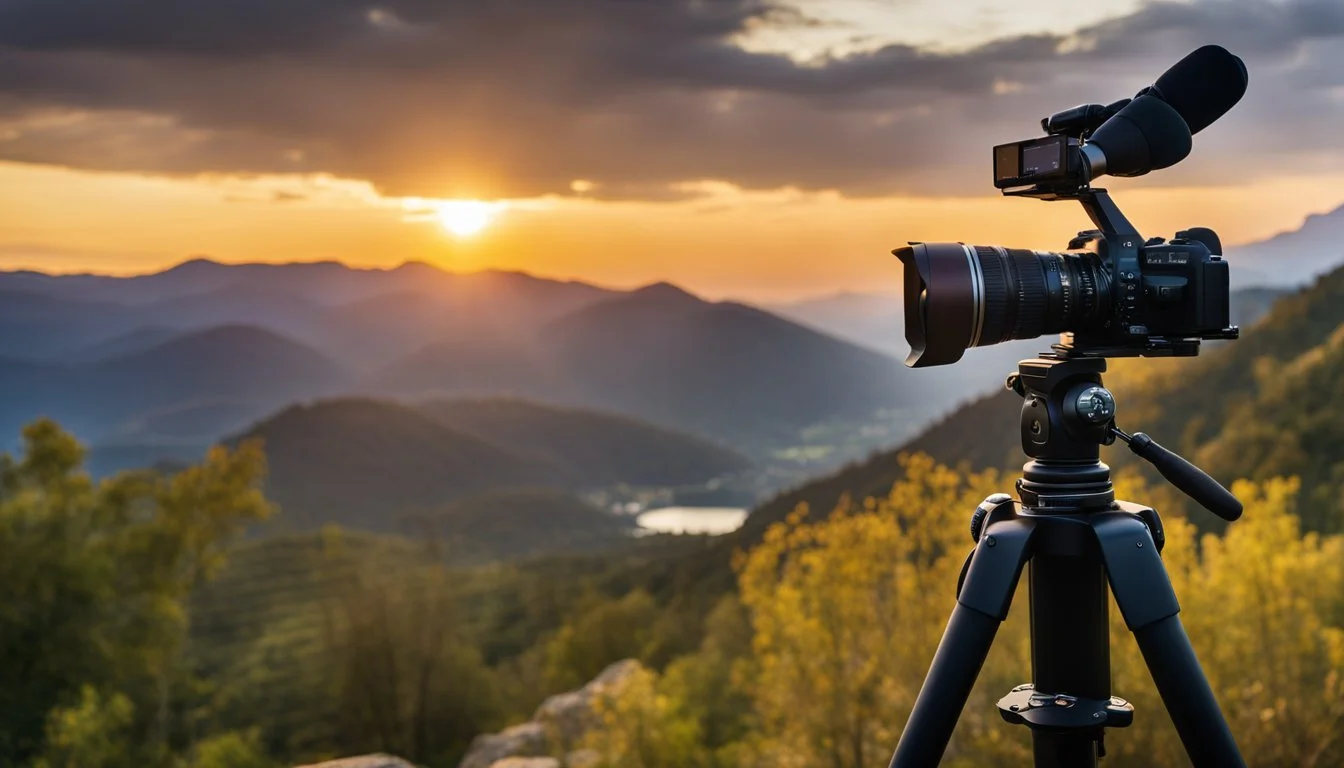
A stable camera is essential for capturing smooth and consistent time-lapse footage. Using a sturdy tripod is the most effective way to achieve this stability. A tripod will prevent camera shake and provide a firm base for long shooting sessions.
For extra stability, consider using a weight or sandbag attached to the tripod. This added weight can help maintain the tripod's position, especially in windy conditions.
Using an intervalometer to trigger the camera's shutter without manually pressing it minimizes vibrations. Alternatively, some cameras have built-in interval timers that can be utilized.
When setting up, ensure the tripod legs are securely locked and spread out to their maximum width. This enhances stability and minimizes the risk of accidental tipping.
For time-lapses shot on uneven surfaces, adjust the tripod legs individually to keep the camera level. A bubble level mounted on the tripod can assist in making precise adjustments.
In situations where a tripod isn't feasible, other stabilizing equipment like monopods or clamp mounts can be beneficial. These tools provide flexibility while still offering decent stability.
Maintaining a stable camera setup is key to achieving high-quality time-lapse footage. It eliminates unwanted movements and ensures consistent results.
3) Use Manual Settings
Using manual settings is essential for achieving stunning time-lapse footage. Automatic modes often fail to provide the necessary control over exposure and other crucial aspects.
Manual control over shutter speed, aperture, and ISO allows for more precise adjustments tailored to the specific conditions of the shoot. This customization can significantly improve the overall quality of the time-lapse video.
Setting the camera to Manual mode ensures consistency across all frames. This consistency is crucial, as fluctuating settings can lead to noticeable inconsistencies in the final video.
Shooting in RAW format is highly recommended. RAW files contain more data than JPEGs, allowing for greater flexibility during post-processing. This flexibility is useful for adjusting exposure, contrast, and color balance without compromising image quality.
Adjusting the white balance manually can help maintain color consistency. Automatic white balance may change during the shoot, leading to color shifts in the final video.
Manual focus is another critical aspect. Autofocus systems can struggle with changing light conditions or different subjects within the frame. Setting focus manually ensures that the target remains sharp throughout the sequence.
Lastly, using a manual intervalometer helps control the timing of each shot. This device can be programmed to take photos at precise intervals, ensuring even spacing between frames.
4) Pick the Perfect Subject
Choosing the right subject is critical for time-lapse photography. It requires identifying scenes or events that exhibit noticeable changes over time. Popular choices include landscapes, cityscapes, starry skies, and bustling urban environments.
Natural elements like clouds, sunsets, and plant growth can also make compelling subjects. They illustrate gradual yet observable transformations beautifully.
Movements of people and vehicles offer dynamic time-lapse results. Capturing construction sites, public gatherings, and traffic can showcase human activity effectively.
Consider the duration of the event. Long-term subjects, like building construction, need patience, while shorter periods, like sunsets, are more immediate.
By carefully selecting subjects that change and develop visibly, you create engaging and visually stimulating time-lapse footage.
5) Plan the Scene in Advance
Planning is a crucial step in time-lapse photography. It allows photographers to capture the best moments and achieve stunning results.
First, choose a location that offers interesting visual changes over time. This could be a bustling cityscape, a serene landscape, or the dynamic night sky.
Next, determine the timing of the shoot. Consider the light conditions, weather, and the movement patterns of your subject.
Make sure to scout the location ahead of time. Look for the best angles, and check for any potential obstructions.
Additionally, ensure you have the right equipment. A sturdy tripod and a camera with manual settings are essential.
By planning the scene in advance, photographers can avoid common pitfalls and create captivating time-lapse footage.
6) Utilize a Slider
A camera slider introduces dynamic movement to time-lapse footage, adding a professional touch. Sliders enable smooth panning shots that can enhance the visual appeal of any scene.
Setting up a slider correctly is essential. Ensure it is level and secure to avoid jerky motions. Position it to capture the desired trajectory, be it horizontal, vertical, or angled.
Automated sliders are particularly useful. They allow for precise control over movement speed and duration. This helps in achieving consistent and repeatable results, which is vital for professional time-lapse photography.
Manual sliders, though less sophisticated, still offer significant benefits. They are more portable and can be used in remote locations without the need for power sources. Adjustments to movement can be made in real-time for creative flexibility.
Sliders also help in maintaining focus and steadiness while capturing long sequences. The gradual movement ensures that the frame transitions smoothly, making post-production workflow more seamless.
Incorporating a slider into time-lapse projects can turn ordinary footage into compelling visual narratives. By mastering the use of a slider, photographers can elevate the impact of their time-lapse work significantly.
7) Shoot in RAW Format
Shooting in RAW format is essential for time-lapse photography. RAW files contain uncompressed and unprocessed image data straight from the camera sensor.
This gives photographers greater control over the editing process. Adjustments to exposure, white balance, and color grading can be made without compromising image quality.
RAW files also preserve more detail and dynamic range compared to JPEGs. This is particularly important in time-lapse photography since each frame must match in quality for a seamless result.
Editing RAW images can take more time and storage space. However, the benefits in post-production flexibility make it a worthwhile consideration for creating professional-grade time-lapse footage.
8) Use Post-Production Software
Editing time-lapse footage is crucial for creating visually compelling videos. Professional software allows for precise control over every frame and detail.
Adobe Premiere Pro is a popular choice due to its comprehensive toolset. It enables users to compile images into a seamless sequence and offers advanced features like color correction and stabilization.
Final Cut Pro is another strong option, especially for macOS users. It's known for its smooth user interface and powerful editing capabilities. It also supports a wide range of formats and resolutions.
For those on a budget, Wondershare Filmora provides an accessible yet powerful platform. It is user-friendly but does not compromise on essential features like transitions, effects, and basic color grading.
Batch processing tools like Adobe Lightroom can handle large numbers of RAW images efficiently. These tools prepare images before they are imported into video editing software, ensuring consistent quality across all frames.
VideoVelocity Time-Lapse Capture Studio offers unique features such as advanced deflicker filters and failure recovery. These tools help in maintaining the quality and continuity of the footage.
Selecting the right post-production software can significantly enhance the final output. It provides the flexibility to correct imperfections and add creative touches, making the footage more engaging and visually appealing.
Understanding Time-Lapse Photography
Time-lapse photography involves capturing images at intervals and playing them back in quick succession to create a video that appears sped up. This technique is versatile and can be used to document natural and urban scenes.
Basic Concepts and Terminology
Time-lapse photography relies on capturing individual frames at specific intervals to condense hours, days, or even months into a short video. The resulting footage can reveal patterns and movements that are otherwise imperceptible to the human eye.
Key terms to know include:
Intervalometer: A device or software that triggers the camera at set intervals.
Frame Rate: The speed at which individual frames are played back per second (typically 24 or 30 fps).
Exposure Settings: Adjustments such as ISO, shutter speed, and aperture that change based on lighting conditions and desired effects.
The process begins with setting the right interval, which depends on the subject being captured. For fast-moving clouds, intervals of 1-3 seconds suffice, while for slower events like plant growth, longer intervals like 30 minutes are needed. Image stability is crucial, often achieved through a sturdy tripod and weights to minimize vibrations.
Different Types of Time-Lapse
Different techniques cater to various subjects and artistic styles. Common types include:
Standard Time-Lapse: Captures scenes in daylight or well-lit conditions. Common subjects include crowds, traffic, and natural landscapes.
Night Time-Lapse: Requires long exposures to capture low-light scenes like star trails or cityscapes at night. Use high ISO settings, but avoid the maximum to reduce noise.
HDR Time-Lapse: Combines multiple exposures per frame to create a high dynamic range image. Useful for scenes with extreme contrast between light and dark areas.
Motion Control Time-Lapse: Incorporates motorized sliders or rotating devices to add camera movement for dynamic effects.
Each type has specific equipment needs, such as intervalometers for standard captures, or motorized tracks for motion control. Selecting the right type depends on the subject, desired effect, and available gear.
Selecting the Right Equipment
Choosing the appropriate tools is pivotal for successful time-lapse photography. The critical components include cameras, lenses, tripods, and stabilization gear. Each plays a distinct role in ensuring high-quality and stable footage.
Cameras and Lenses
Specialized cameras for time-lapse photography should offer manual controls and the ability to shoot in RAW format. DSLR and mirrorless cameras are the most popular choices due to their high image quality and flexibility.
For lenses, wide-angle options are favored for capturing expansive scenes such as landscapes and cityscapes. Fixed focal length (prime) lenses are recommended for their sharpness and wide apertures. Additionally, lenses with aperture control are essential to maintain consistent exposure throughout the sequence.
Tripods and Stabilization
A sturdy tripod is non-negotiable to avoid camera shake during long shooting periods. Look for tripods made from materials like carbon fiber or aluminum for strength and portability. Weight stability can be enhanced by hanging a bag of rocks from the tripod's center column.
Motorized sliders and pan/tilt heads add dynamic motion to your time-lapse, making your footage more engaging. Consider using bean bags or other weights to further stabilize your camera setup under windy conditions or uneven terrain.
Post-Processing Techniques
Post-processing is vital for transforming raw time-lapse sequences into professional-quality footage. It involves choosing the right editing software and applying color correction and grading to enhance visual appeal.
Editing Software Options
Selecting the right editing software is the first step in post-processing. Adobe Premiere Pro, Final Cut Pro, and Photoshop are popular choices among professionals. Each offers unique tools and capabilities.
Adobe Premiere Pro, for instance, provides advanced video editing features that allow for precise control over the sequence. Final Cut Pro is known for its user-friendly interface and powerful rendering engine, making it ideal for Mac users. Photoshop, while primarily an image editor, can also create time-lapse videos by compiling sequential images.
Color Correction and Grading
Once the sequence is edited, attention must shift to color correction and grading. These processes ensure the footage is visually consistent and aesthetically pleasing.
Color correction involves adjusting the white balance, exposure, and saturation to create a uniform look. Tools such as Lumetri Color Panel in Adobe Premiere Pro and Color Board in Final Cut Pro are instrumental in achieving accurate color correction.
Color grading adds stylistic touches, enhancing mood and tone. This might involve applying LUTs (Look-Up Tables) or using preset filters. Advanced grading can dramatically alter the footage's appearance, providing a cinematic look that captivates audiences.
Advanced Tips and Tricks
Mastering time-lapse photography involves addressing specific challenges, such as varying light conditions and introducing motion for dynamic effects. The following tips will guide you through these advanced techniques.
Dealing with Changing Light Conditions
Light can change dramatically during a time-lapse shoot, especially at sunrise or sunset.
One key strategy is to use aperture priority mode. This allows the camera to adjust the shutter speed automatically, maintaining consistent exposure as light changes.
It is also helpful to employ exposure smoothing features found in some intervalometers and cameras. These features adjust settings to minimize flickering between frames.
For post-processing, use software like LRTimelapse to fix any abrupt light changes and ensure smooth transitions.
Combining these methods will produce high-quality, stable time-lapse videos without noticeable shifts in brightness.
Incorporating Motion into Time-Lapse
Adding motion can elevate the visual interest of your time-lapse videos. A motorized slider can provide smooth, linear movement of the camera, enhancing depth and dynamism.
For rotational movement, a panning head offers controlled, horizontal motion.
If budget-friendly options are necessary, consider DIY solutions like using a kitchen timer to create a panning effect.
Hyperlapse techniques, which involve moving the camera considerable distances between shots, yield dramatic results but require precision in planning and execution.
These methods, whether using professional equipment or inventive alternatives, significantly enhance the storytelling capability of time-lapse photography.